So let’s make a mitered half lap frame using our well fettled miter box, shall we?
I do not profess this to be the best or most efficient way to make such a frame, but I like it because there’s no measuring with a ruler and it relies instead on using the length and depth stops of the miter box to make corresponding, repetitive cuts.
Presumably, if you are using a hand miter box you have chosen to spend your time fussing over the wood rather than fussing over machine tool settings.
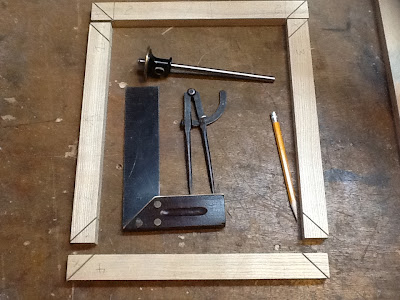
Tools required: miter box (obviously), sharp paring chisel, mallet, marking gauge, compass/dividers, try square, spring clamps, router plane, block plane, rebate plane.
First,
let’s prepare some four-square (i.e. S4S) stock. I’ve used a scrap
chunk of northern white ash for this demonstration, a little over 12
inches long by 5-plus inches wide by slightly less than 3/4 inches
thick. It has been planed, thicknessed, jointed and squared by machine.

Now
let’s rip it into four frame parts, each about 1-1/8 inches wide. (I’ve
numbered them just to make it easier to follow along with the
pictures.)

I prefer to keep the ends of all the pieces square. It makes it easier to use the length stops on the Langdon.
On both ends of each frame piece mark the exact centerline along three edges. Then roughly lay out with pencil approximately where the angled miter cuts will go, and which bits are to be sawn away from each end when making the joint. These pencil marks are for your visual reference, they are not cut lines.
Set the depth stops such that the saw almost but not quite cuts half way through the workpiece. You need to leave a little wood (but not a lot) for your router plane to neatly level off so that you get a sharp and clean looking end result. You can also use a spirit level to make sure that the saw cut finishes level (i.e. the bottom of the kerf is parallel to the face of the workpiece) to make that leveling a bit easier

If I were going to rebate this frame (for glass, backing, etc.) I would cut the rebates now while the pieces are flat and rectangular. (I left these out for this demonstration, choosing to focus on the making of the mitered half laps per se, rather than a complete picture frame with all the bells and whistles.)
Using the dividers, mark off a 45-degree miter cut line on the end of just one workpiece. Using the appropriate 45-degree detent, align the saw blade just inboard of that line. Now set the length stop against the opposite end of the workpiece and tighten it down.
N.B. The saw kerf should lie fully on the workpiece and not at all on the waste side of the line. In other words I am making this kerf just inboard of the actual corner of the workpiece. Doing so will ensure that there will be a sawblade’s thickness of excess material to trim off the joint later, making for a perfectly flush finished edge.

Using
this one detent setting, make the 45-degree miter cut on one end of
each workpiece, using the length stop to ensure that all the cuts are
made identically on each workpiece.

Leaving
the length stop in position, and changing to the 0-degree detent
setting, make the perpendicular shoulder cuts on the underside of the
appropriate pair of frame pieces. Doing it this way ensures automatic
alignment of the cuts on opposite faces of each work piece.

Your cuts on the underside of the frame so far should look like this:

Now
using the other 45-degree detent setting, cut the remaining miters on
the other ends of the frame members, resetting the length stop to ensure
that you make identical cuts on each piece. When setting the length
stop you want to be certain that the cut you are about to make aligns
with the perpendicular shoulder on the underside of the workpiece. This is the most critical cut you’re going to make. Take your time to align it properly.
Move
the length stop out of the way. Make a series of perpendicular saw
kerfs from the shoulders all the way to the ends of the workpiece.

Make
a series of 45-degree cuts from the miter shoulder all the way to the
end of each workpiece. Be careful that you do this on the correct face
of each workpiece! The horizontal members get this treatment on “front”
face, and the vertical members on the “rear” face. Therefore the photo
shows an error on my part, where I made a second cut on the wrong face
of the left hand vertical member. Fortunately for me, this will be
easily corrected in the next step. (Astute observers will also note that
the right hand frame member should be turned end-for-end. I positioned
it incorrectly when snapping this photo.)

Reset the depth stops such that from now on you will cut all the way through the workpiece.
Cut off the mitered ends from the appropriate pair of frame members. (If you enlarge this photo below, you will see that there are 45-degree saw cuts on the bottom face of the vertical members.)

Using
a chisel,chip out the waste and roughly level all of the miter joint
surfaces, taking care to stay above the marked centerline of the
workpiece.

Using a router hand plane whose cutter is set precisely to one half the thickness of the workpieces, finely level the miter joint surfaces.
[photo missing]
Dry fit your frame.

With
a careful sawing and leveling your miters should be tight. The slight
bit sticking out on the left is the intended result of making the miter
shoulder cut just inboard of the corner of the workpiece, and will be
trimmed flush later.

Make any necessary fine adjustments with the chisel or router plane, then glue up the frame.

After the glue has dried, trim off the excess bits with a sharp block plane.

The completed frame, ready to be sanded and finished to your liking.

You now have a mitered frame that is as rock solid as can be. Enjoy!
It so happens that I rediscovered this example frame 6 years after I wrote this article. It had been left in an unheated garage all that while, waiting to be used for some purpose or other. It is still as solid and tight and flat as the day I made it, a testament to the strength of half lap joints.
